Safari Themed Cot Canopy
- Devon Long
- May 1, 2025
- 3 min read


Creating a cot canopy for our nursery was such a rewarding project, especially because I got to do it with my mother-in-law, Sue. Together, we combined functionality with aesthetics to craft a canopy that not only solved a practical issue but also tied beautifully into our safari-themed nursery. Here’s how we did it, step by step.
The Objectives
We had two clear goals in mind for this project:
Functionality: Our nursery gets a lot of morning sunlight, and while the plantation shutters block most of it, some light still filters through. A canopy was the perfect solution to create a darker, cozier sleeping environment for the baby. However, my husband was adamant—no ceiling attachments allowed. So, we needed a way to secure the canopy directly to the cot itself.
Aesthetics: We wanted the canopy to seamlessly match the safari-themed nursery. It needed to feel elegant and cohesive, avoiding anything that might look overly flashy or out of place.
Step 1: Sourcing a Hanging Mechanism
The first step was finding the right hanging mechanism. Most of the options we came across that were designed to attach to the cot rather than the ceiling were more of a single bar style. While functional, the single bar didn’t quite fit the aesthetic we envisioned. We really liked the softer, more elegant look of a ring-style hanger, so we felt lucky to find one that not only had the ring design but also the required height for our project. You can find it here. Below you can see how it came.

Step 2: Developing a Plan
Using some online guides as a starting point, we decided on how to approach the canopy. The design called for several rectangular panels, each 2.5 meters long, collectively forming an approximately 4-meter diameter canopy that would be pleated to fit on to the canopy ring we had ordered. The number of panels depended on the fabric width. We also decided we wanted to attach some faux foliage to around the top of canopy to tie in with the theme for the rest of the nursery.
Step 3: Sourcing the Fabric
We headed to Spotlight, a craft store here in Australia, to find the perfect fabric. After browsing, we chose a beautiful, lightweight muslin fabric with a subtle pattern and a natural fiber color. Importantly - once we had picked a fabric, we finalised our pattern based on the width of the fabric which was 1.38 m.
Step 3: Developing Pattern
You can find the pattern we developed below. With a width of 1.38m, we opted for 3 panels. This gave us a total diameter of 4.14 which was close enough to our goal of a 4m diameter.


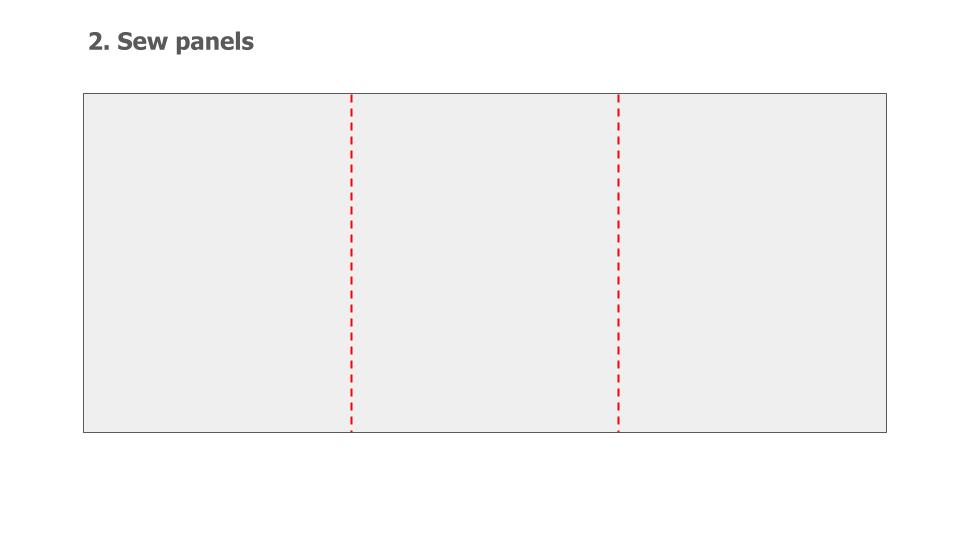


Step 4: Sewing

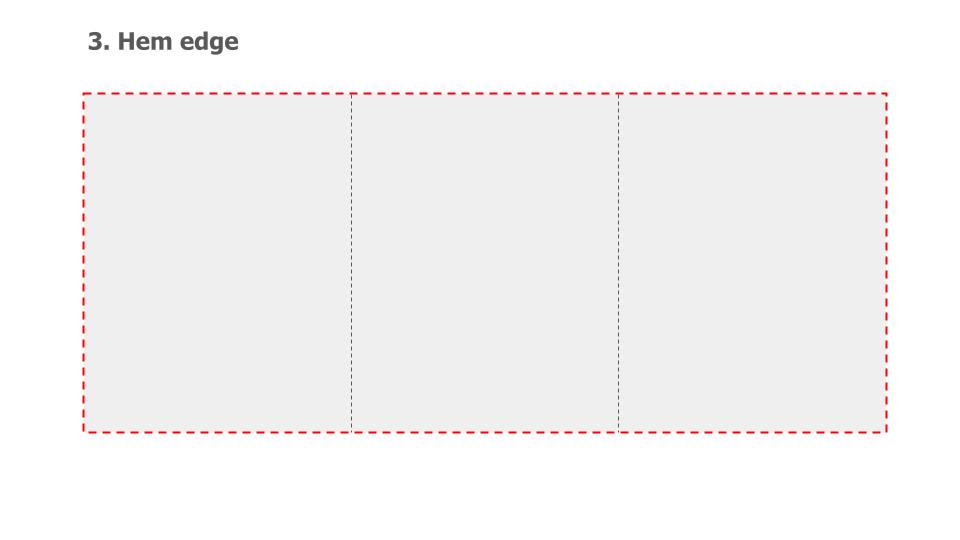
Sue took charge of the sewing the panels. She started by sewing the panels together. Importantly, we left two panels unattached to create the canopy’s opening. Next, she hemmed the top and bottom edges with a straight stitch and then a blanket stitch.

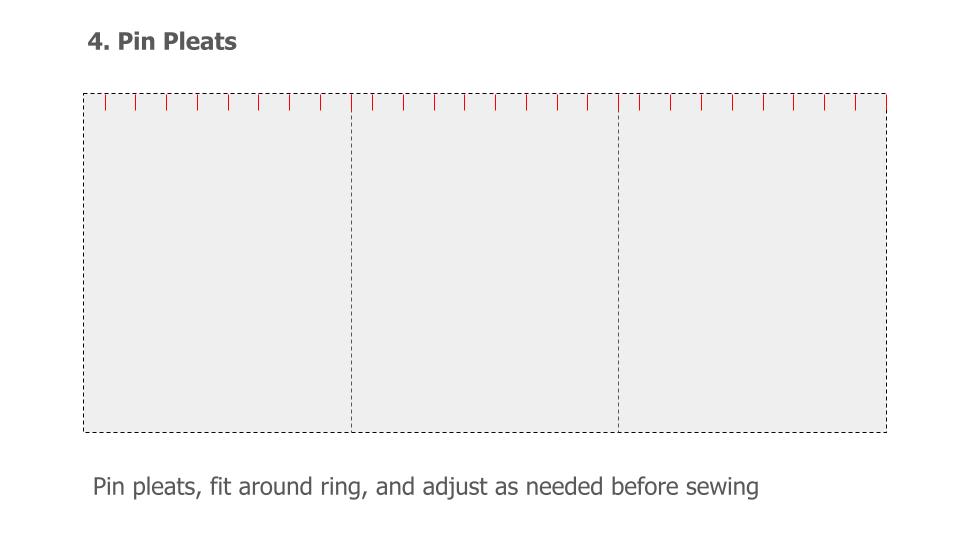
Next, Sue pinned the pleats, making them roughly 5cm each. Once pinned in place, she measured against the canopy ring and mad some adjustments so that it fit the ring with a little extra to spare. Then she stitched over the pleats to secure everything.

Step 6: Attaching the Canopy to the Canopy Ring
We folded the canopy over the top of the ring, pinned it, and then hand stitched around the ring.

Then, we hand-stitched the faux foliage around the top of the ring, ensuring it sat lightly and elegantly once the fabric was secured.
Step 7: Attaching the Canopy to the Cot
The hanging mechanism we chose came with a simple attachment system, but there were a couple of limitations:
The ring couldn’t swivel, so it stuck out at a right angle from wherever we attached it. This means it looked a bit awkward in a corner.
Our cot’s sleigh design meant the mechanism could only attach to the sides of the cot, not the ends.
Ultimately, we decided to position the canopy in the middle of the cot’s side for a symmetrical look. It worked beautifully in our nursery, but this might vary depending on your cot’s design or placement.
Finally, we used a simple S hook to attach the existing cot mobile to new canopy.

Cost Breakdown (AUD)
Here’s what we spent to bring this project to life:
Fabric: $73.50
Thread: Already had this on hand
Foliage: Already had this from decorating the nursery
Hanging Mechanism: $36.99


So fantastic! So many helpers! Thanks for sharing!